Takoyaki is one of Osaka’s most beloved street foods, and for good reason. These little golden octopus balls have a wonderfully contrasting texture, with a lightly crisp exterior and a soft, tender, almost custardy center. Every bite brings together savory dashi, sweet and salty notes, fresh green onions, and the distinctive flavor of tender octopus.
The secret to authentic takoyaki is the thin, dashi-based batter. Unlike a thick pancake batter, this mixture is intentionally loose, allowing the inside to remain delicate while the outside develops a beautifully browned crust. A little baking powder helps create a light texture, while soy sauce, sugar, and salt build a balanced savory foundation.
The fillings are just as important. Tender octopus provides the signature seafood flavor, beni shoga adds a bright, slightly spicy acidity, and tenkasu (crispy tempura bits) brings little pockets of crunch. Fresh scallions round everything out with a clean, aromatic finish.
Making takoyaki takes a little practice, especially when it comes to turning the balls in their individual wells. However, once you get comfortable with the technique, the process becomes a fun cooking activity. A takoyaki pan is essential for achieving the traditional round shape, and bamboo picks make turning the batter much easier.
Serve these Japanese favorites piping hot with takoyaki sauce, Japanese mayonnaise, aonori, and shaved bonito flakes. They’re perfect for a casual weekend snack, an appetizer for a Japanese-inspired dinner, or a fun family cooking night.
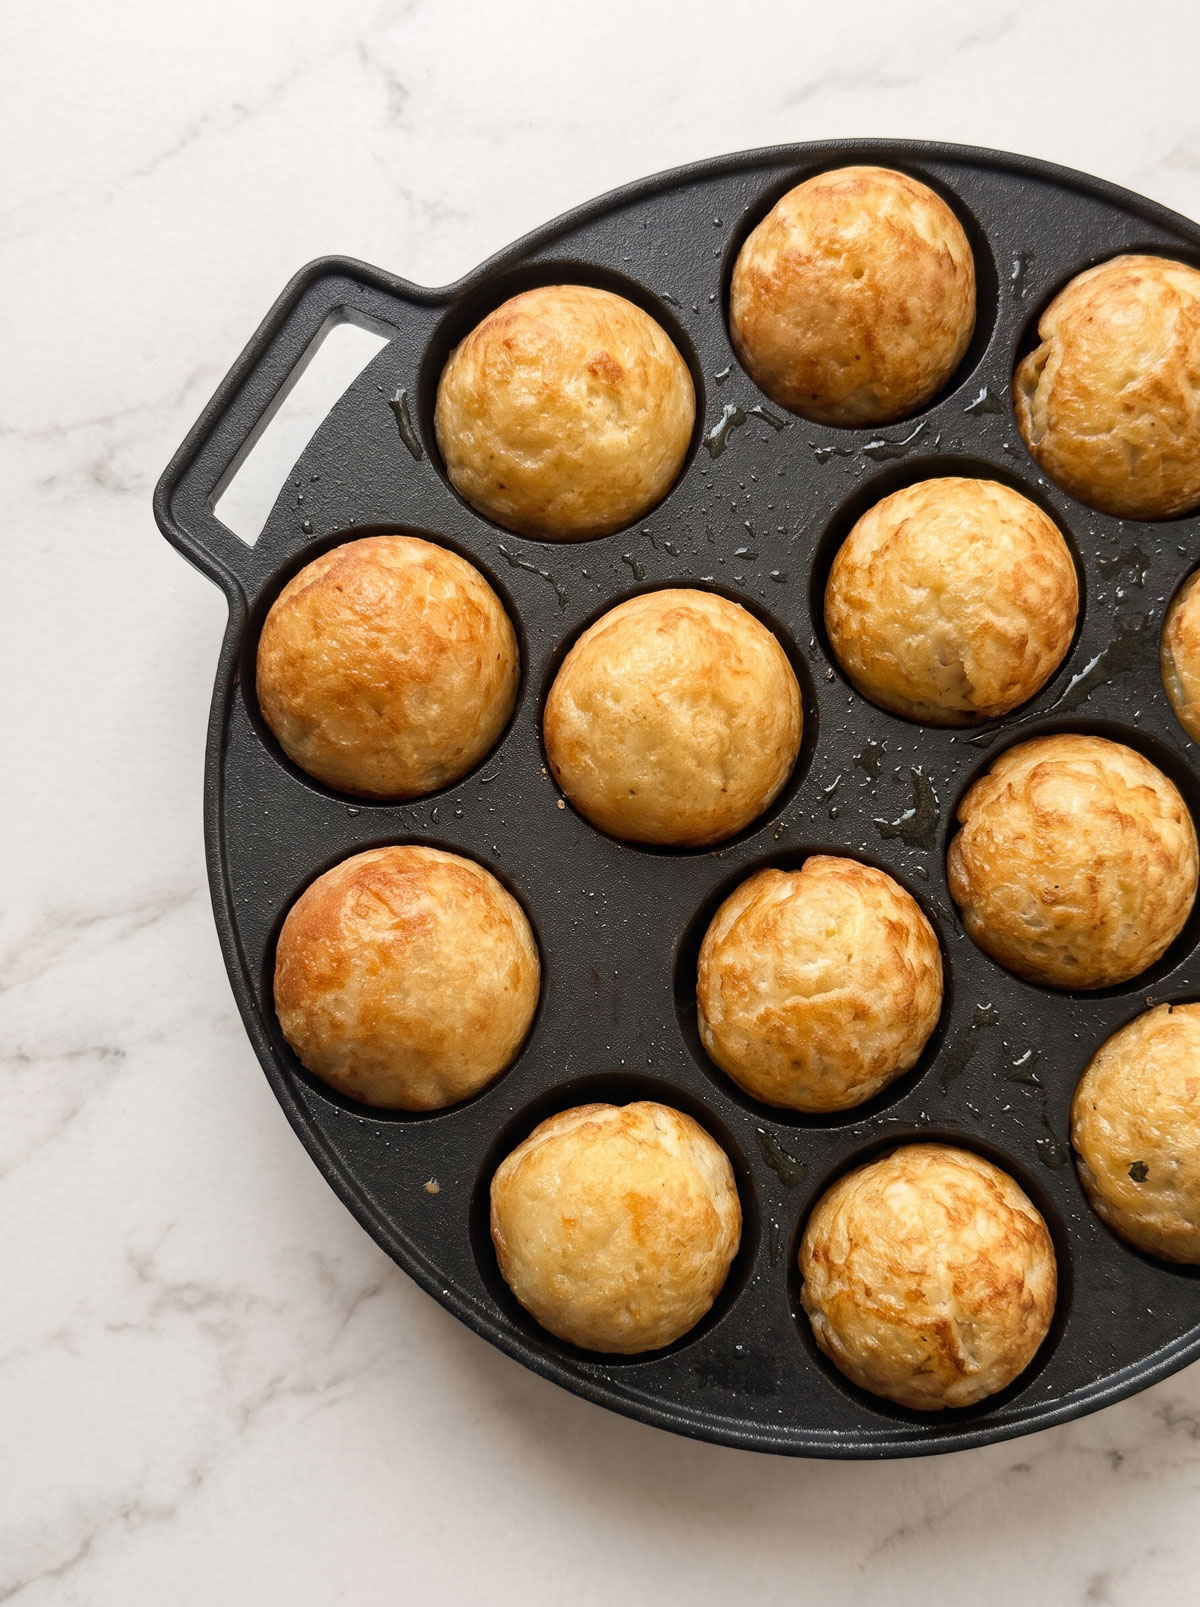
Love Japanese street food? Save this takoyaki recipe to your Japanese food board on Pinterest so you can make it whenever a savory snack craving strikes!
Why You’ll Love This Recipe
– Authentic Osaka Flavor: Traditional ingredients like dashi, beni shoga, tenkasu, and octopus create the distinctive savory flavor associated with Japanese street-food takoyaki.
– Wonderful Texture Contrast: The outside becomes lightly crisp and golden, while the inside stays soft, moist, and tender.
– Packed With Flavor: Every ball combines savory seafood, aromatic scallions, tangy pickled ginger, and crispy tempura bits.
– Fun Cooking Experience: Turning the batter into perfectly round balls is a satisfying technique that becomes easier with practice.
– Customizable Toppings: Finish each serving with Japanese mayonnaise, takoyaki sauce, aonori, and bonito flakes according to your preference.
Key Ingredients & Why
– Octopus: The defining ingredient of takoyaki. Boiled octopus provides a pleasantly chewy seafood texture and mild, slightly sweet flavor. Cutting it into small, evenly sized pieces helps distribute it throughout the balls.
– Dashi Stock: This Japanese soup stock gives the batter its characteristic umami depth. Chilled dashi also helps keep the batter cool while preparing it, making the mixture easier to handle.
– Beni Shoga (Red Pickled Ginger): Adds a bright, tangy, and slightly spicy contrast to the savory batter. Its acidity helps balance the richness of the finished takoyaki.
– Tenkasu (Tempura Bits): These crispy fried batter pieces add texture and little pockets of crunch. They also contribute a subtle fried flavor that complements the octopus.
– Green Onions: Provide freshness and a mild onion aroma that balances the seafood and savory batter.
– Baking Powder: Helps create a lighter interior by releasing carbon dioxide during cooking, contributing to the characteristic soft texture.
Variations & Substitutions
Traditional takoyaki gets much of its identity from the combination of octopus, dashi, ginger, and tempura bits. Keep these signature ingredients whenever possible for the most recognizable Osaka-style flavor.
– Kombu Dashi: For a plant-based stock option, replace the bonito-based dashi with kombu dashi using an exact 1:1 ratio. This provides a clean, savory foundation without changing the batter proportions.
– Shiitake Dashi: Substitute shiitake dashi for the regular dashi at a 1:1 ratio. It provides a deeper, earthy umami flavor.
– Lower-Sodium Soy Sauce: Replace regular soy sauce with reduced-sodium soy sauce using a 1:1 ratio. The finished batter may taste slightly less intense, so keep the other seasonings unchanged initially.
– Homemade Tenkasu: If packaged tempura bits are unavailable, use small pieces of leftover plain tempura batter that have been fried until crisp. Measure out 4 tbsp before adding them.
Equipment Needed
– Takoyaki Pan: Essential for creating the traditional round shape. Use an electric takoyaki maker or a stovetop cast-iron takoyaki pan. A regular flat skillet cannot produce authentic round takoyaki.
– Takoyaki Picks: Used to lift, turn, and rotate the batter inside each well. Bamboo picks or specialized takoyaki turning picks work well. Avoid sharp metal utensils on nonstick pans because they can scratch the coating.
– Mixing Bowl: A medium or large bowl is needed to combine the thin batter thoroughly.
– Measuring Cups and Spoons: Accurate measurements help maintain the proper loose batter consistency.
– Whisk: Helps incorporate the flour, egg, and dashi without leaving large lumps.
Yield & Exact Sizing
– Total Yield: 24 takoyaki balls, approximately 12 per serving.
– Size & Shape: Each ball should measure approximately 1½-2 inches (4-5 cm) in diameter once fully cooked.
– Filling Distribution: Divide the octopus and other fillings evenly among the 24 wells. Each ball should contain a small piece of octopus.
– Cooking Shrinkage: Takoyaki does not significantly shrink during cooking. The batter sets and forms a rounded exterior as it is turned, so the finished size depends mainly on the pan’s well dimensions.
Ingredients
For the Takoyaki Filling:
3 oz boiled octopus, cut into small bite-sized pieces
6 green onions (scallions), finely chopped
1 tbsp beni shoga (red pickled ginger), finely chopped
4 tbsp tenkasu (tempura bits)
For the Takoyaki Batter:
1 large egg (approximately 2.1 oz, including shell)
½ tsp sugar
¼ tsp salt
2 tsp soy sauce (use 1 tsp if adding takoyaki sauce to the batter)
1¼ cups chilled dashi stock
½ tsp baking powder
⅗ cup all-purpose flour (plain flour)
For the Toppings (Optional):
Takoyaki sauce, to taste
Japanese mayonnaise, such as Kewpie
Aonori (dried green seaweed flakes), to taste
Shaved bonito flakes (katsuobushi), to taste
Instructions
1. Prepare the octopus and fillings. Cut the boiled octopus into small, bite-sized pieces that will fit comfortably inside the takoyaki wells. Finely chop the green onions and beni shoga, then arrange the octopus, scallions, pickled ginger, and tenkasu near the cooking area.
2. Mix the wet batter ingredients. Crack the egg into a large mixing bowl and whisk until blended. Add the chilled dashi stock, sugar, salt, and soy sauce. Whisk until the seasonings are evenly distributed.
3. Incorporate the dry ingredients. Add the baking powder and all-purpose flour to the liquid mixture. Whisk gently until combined. A few tiny lumps are acceptable. Avoid overmixing, as the batter should remain thin and pourable.
4. Preheat the takoyaki pan. Heat the takoyaki pan over medium heat. Lightly coat every well and the surrounding flat surface with cooking oil. Make sure the wells are evenly greased before adding the batter.
5. Fill the pan with batter. Pour the batter into each well until it is nearly full. Allow a little batter to spill across the spaces between the wells. This extra batter helps form complete, rounded balls during turning.
6. Add the fillings. Place a piece of octopus into each well. Distribute the chopped green onions, beni shoga, and tenkasu evenly across the pan so every takoyaki gets a balanced amount of filling.
7. Begin turning the takoyaki. Once the batter starts setting around the edges and the bottoms begin to firm up, use takoyaki picks to loosen the edges. Turn each piece approximately 90 degrees, tucking some of the loose batter underneath.
8. Shape the balls. Continue rotating each takoyaki in small increments, incorporating the excess batter into the center as you turn. Keep moving the balls so they cook evenly and develop a rounded shape.
9. Cook until golden. Continue turning over medium heat until the takoyaki are evenly golden brown and crisp on the outside. Adjust the heat if the exterior browns too quickly before the centers have finished cooking.
10. Serve immediately. Transfer the cooked takoyaki to a serving plate. Drizzle with takoyaki sauce and Japanese mayonnaise, then sprinkle with aonori and shaved bonito flakes if desired. Serve hot.
Visual & Tactile Cues
Batter Preparation
- Consistency: The finished batter should be noticeably thinner than pancake batter. It should pour easily from a measuring cup or ladle.
- Appearance: The mixture should look smooth and pale, with no large pockets of dry flour.
- Mixing: Avoid excessive whisking. A few small lumps will not prevent the takoyaki from cooking properly.
Initial Cooking
- Batter Setting: The edges should begin to look opaque and slightly firm while the center remains loose.
- Bottom Formation: The underside should develop a light golden color before the first turn.
- Turning Readiness: A takoyaki pick should slide underneath the edges without pulling the entire piece apart.
Shaping and Browning
- Exterior: The outside should gradually become golden brown with small areas of deeper caramelization.
- Shape: Each ball should become increasingly rounded as loose batter is tucked underneath.
- Texture: The exterior should feel lightly crisp when gently touched with a pick.
- Aroma: A pleasant combination of toasted batter, savory dashi, scallions, and seafood should develop as the balls cook.
Finished Takoyaki
- Color: Golden brown on all sides.
- Structure: The exterior should hold its round shape without collapsing.
- Interior: The center should be moist and tender, not raw or floury. Because the batter is deliberately loose, the interior is naturally much softer than a regular pancake.
Cooking Notes (Pro Tips)
– Keep the Dashi Chilled: Cold dashi helps keep the batter cool during preparation. This is particularly useful when making a large batch.
– Do Not Overfill With Octopus: Each well needs only a small piece of octopus. Too much filling makes turning difficult and can prevent the batter from forming a neat sphere.
– Oil the Entire Cooking Surface: Do not grease only the wells. Lightly oil the spaces between them, too, because the excess batter needs to release easily when shaping the balls.
– Master the First Turn: Resist the temptation to turn the takoyaki too early. The bottom needs enough time to develop a stable structure, or the balls may break apart.
Storage & Reheating Guide
Takoyaki is best enjoyed immediately after cooking, when the outside is crisp and the center is soft. If you have leftovers, store them promptly to maintain food quality and safety.
– Refrigerator: Allow the cooked takoyaki to cool briefly, then place them in an airtight container. Refrigerate for up to 3-4 days.
– Freezer: Freeze cooled, un-topped takoyaki in a single layer until firm, then transfer them to a freezer-safe container or bag. For best quality, use within 1-2 months.
– Oven Reheating: Preheat the oven to 350°F (180°C). Arrange the takoyaki on a baking sheet and heat until thoroughly warmed, approximately 8-12 minutes depending on their size and starting temperature.
– Air Fryer Reheating: Heat at 350°F (180°C) for approximately 5-8 minutes, checking that the centers are thoroughly hot.
– From Frozen: Reheat directly from frozen in an oven or air fryer, allowing additional time until the centers are thoroughly heated.
– Avoid Microwaving: Microwaving tends to make the exterior soft and rubbery rather than restoring its lightly crisp texture. Use an oven or air fryer for better results.
– Topping Storage: Store sauces and other toppings separately. Add them after reheating to preserve their flavor and presentation.
Serving Suggestions
Takoyaki is perfect for a casual Japanese-inspired snack night, a weekend appetizer, or a fun shared meal. Its savory seafood flavor and soft interior pair especially well with fresh, light sides and traditional Japanese accompaniments.
– Japanese Cucumber Salad (Sunomono): Thinly sliced cucumber dressed with rice vinegar, a little sugar, and sesame seeds provides a refreshing, tangy contrast to the rich takoyaki.
– Edamame With Sea Salt: Steamed edamame is an easy, protein-rich side that requires minimal preparation and complements the Japanese flavors without competing with them.
– Miso Soup: A small bowl of warm miso soup with tofu and wakame creates a comforting pairing and adds another layer of savory umami.
– Japanese Pickled Vegetables: Serve takuan (pickled daikon) or other Japanese pickles alongside the takoyaki. Their crisp texture and tangy flavor help balance the soft, savory octopus balls.
Nutrition Facts
Estimated Nutrition per Serving
- Calories: 380 kcal
- Fat: 14 g
- Carb: 45 g
- Protein: 19 g
Disclaimer: This nutritional information is an estimate provided by an online calculator and is meant for informational purposes only. Actual values will vary depending on the ingredients, cooking oil absorption, and optional toppings used.
Recipe Science
Takoyaki is a Japanese street-food dish traditionally associated with Osaka. It consists of small portions of octopus enclosed in a thin batter made from flour, egg, dashi stock, and seasonings. The batter is cooked in a specialized pan with hemispherical wells, then repeatedly turned to create compact, rounded pieces with browned exteriors and soft interiors.
The batter’s texture depends on its relatively high liquid-to-flour ratio. Dashi contributes dissolved savory compounds, including glutamates, that create umami and enhance the seafood flavor. Egg proteins coagulate as the batter heats, helping the structure set, while starch in the flour absorbs water and thickens the mixture. Baking powder releases carbon dioxide during heating, contributing to a lighter internal structure. Tenkasu adds small pockets of crispness, while beni shoga provides acidity that contrasts with the savory ingredients.
The cooking method requires controlled heat and repeated rotation. The outer batter sets first through contact with the heated metal surface, allowing the developing structure to hold together as it is turned. Oil promotes heat transfer and helps prevent sticking, while repeated rotation distributes browning around the exterior. For storage, rapid cooling and airtight refrigeration help limit moisture loss and reduce exposure to contaminants. Reheating in an oven or air fryer helps restore some exterior crispness more effectively than microwave heating.
Nutritionally, takoyaki provides carbohydrates primarily from flour, protein from octopus and egg, and fat from egg, tempura bits, and cooking oil. Soy sauce and added salt contribute sodium. The FDA Daily Value for sodium is 2,300 mg, and the Daily Value for saturated fat is 20 g. The estimated sodium content of this recipe may exceed 20% of the Daily Value per serving, depending on the dashi, soy sauce, and toppings used. Using reduced-sodium soy sauce and limiting salty toppings can reduce sodium. Optional sauces and mayonnaise can also increase the total fat, sodium, and added sugar content.
Frequently Asked Questions
– Can I make takoyaki without a special takoyaki pan? A traditional takoyaki pan is necessary for the signature spherical shape. A Danish aebleskiver pan may provide a similar cooking surface, although the results can differ slightly.
– Why is my takoyaki batter so watery? Takoyaki batter is intentionally thin. Its loose consistency helps create the characteristic soft, tender interior. It should not resemble thick pancake batter.
– Can I prepare the batter ahead of time? Yes. You can prepare the batter a few hours ahead and keep it covered in the refrigerator. Stir gently before using because some flour may settle at the bottom.
– What can I use instead of bonito dashi outside Japan? Kombu dashi and shiitake dashi are excellent alternatives that are often easier to prepare with internationally available ingredients. Both provide umami while preserving the savory character of the batter.
– Where can I find beni shoga and tenkasu? Look for them in Japanese or Asian grocery stores. Online Japanese food retailers may also carry both ingredients. Check the refrigerated pickle section for beni shoga and the tempura ingredient section for tenkasu.
– Why are my takoyaki falling apart when I turn them? The batter may not have set sufficiently. Wait until the edges and bottom become firm before attempting the first turn. Also check that the pan is properly heated and greased.
– Can I serve takoyaki without the traditional toppings? Absolutely. Takoyaki is flavorful on its own, although takoyaki sauce, Japanese mayonnaise, aonori, and bonito flakes provide the familiar street-food finish.
– Are bonito flakes supposed to move on top of takoyaki? Yes. Shaved bonito flakes are extremely thin and react to the heat and rising air currents from freshly cooked takoyaki. Their gentle movement is a normal characteristic of the topping.
Conclusion
Making authentic Osaka-style takoyaki at home is a wonderful way to bring a little Japanese street-food culture into your kitchen. The first few balls might take some practice to turn, but once you get the technique, you’ll be rewarded with golden, savory bites filled with tender octopus and delicious umami flavor.
Remember, cooking is a journey, and every batch is an opportunity to learn something new. Have you tried making takoyaki before, or will this be your first time? I’d love to hear how yours turns out and which toppings you enjoy most!
Happy cooking, friend!
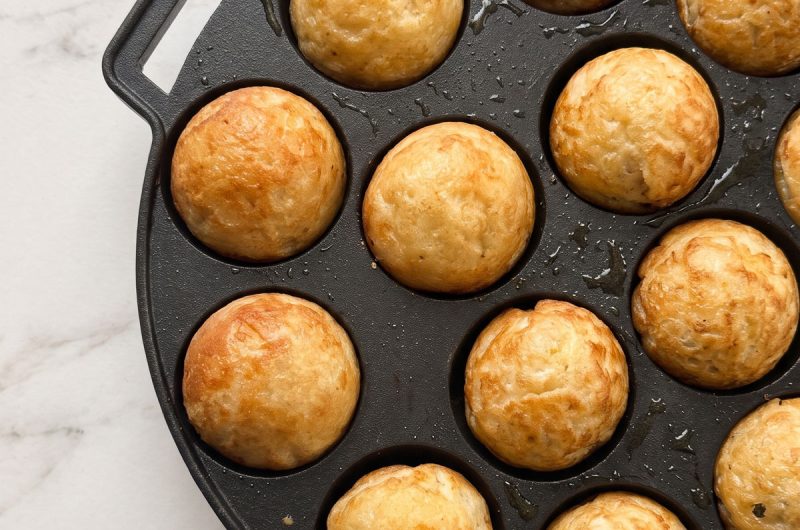
Takoyaki
Course: AppetizersCuisine: JapaneseDifficulty: Easy2
servings20
minutes20
minutes380
kcalThese authentic Osaka-style takoyaki feature tender pieces of octopus nestled inside a delicate, savory batter with green onions, pickled ginger, and crispy tempura bits. Cooked in a special takoyaki pan until golden on the outside and soft and creamy in the center, they’re finished with classic Japanese toppings for a delicious street-food experience at home.
Ingredients
- For the Takoyaki Filling:
3 oz boiled octopus, cut into small bite-sized pieces
6 green onions (scallions), finely chopped
1 tbsp beni shoga (red pickled ginger), finely chopped
4 tbsp tenkasu (tempura bits)
- For the Takoyaki Batter:
1 large egg (approximately 2.1 oz, including shell)
½ tsp sugar
¼ tsp salt
2 tsp soy sauce (use 1 tsp if adding takoyaki sauce to the batter)
1¼ cups chilled dashi stock
½ tsp baking powder
⅗ cup all-purpose flour (plain flour)
- For the Toppings (Optional):
Takoyaki sauce, to taste
Japanese mayonnaise, such as Kewpie
Aonori (dried green seaweed flakes), to taste
Shaved bonito flakes (katsuobushi), to taste
Directions
- Prepare the octopus and fillings. Cut the boiled octopus into small, bite-sized pieces that will fit comfortably inside the takoyaki wells. Finely chop the green onions and beni shoga, then arrange the octopus, scallions, pickled ginger, and tenkasu near the cooking area.
- Mix the wet batter ingredients. Crack the egg into a large mixing bowl and whisk until blended. Add the chilled dashi stock, sugar, salt, and soy sauce. Whisk until the seasonings are evenly distributed.
- Incorporate the dry ingredients. Add the baking powder and all-purpose flour to the liquid mixture. Whisk gently until combined. A few tiny lumps are acceptable. Avoid overmixing, as the batter should remain thin and pourable.
- Preheat the takoyaki pan. Heat the takoyaki pan over medium heat. Lightly coat every well and the surrounding flat surface with cooking oil. Make sure the wells are evenly greased before adding the batter.
- Fill the pan with batter. Pour the batter into each well until it is nearly full. Allow a little batter to spill across the spaces between the wells. This extra batter helps form complete, rounded balls during turning.
- Add the fillings. Place a piece of octopus into each well. Distribute the chopped green onions, beni shoga, and tenkasu evenly across the pan so every takoyaki gets a balanced amount of filling.
- Begin turning the takoyaki. Once the batter starts setting around the edges and the bottoms begin to firm up, use takoyaki picks to loosen the edges. Turn each piece approximately 90 degrees, tucking some of the loose batter underneath.
- Shape the balls. Continue rotating each takoyaki in small increments, incorporating the excess batter into the center as you turn. Keep moving the balls so they cook evenly and develop a rounded shape.
- Cook until golden. Continue turning over medium heat until the takoyaki are evenly golden brown and crisp on the outside. Adjust the heat if the exterior browns too quickly before the centers have finished cooking.
- 10. Serve immediately. Transfer the cooked takoyaki to a serving plate. Drizzle with takoyaki sauce and Japanese mayonnaise, then sprinkle with aonori and shaved bonito flakes if desired. Serve hot.