There is something special about a homemade birthday cake, especially one as adorable as this Jellycat-inspired creation. With its soft sponge layers, fluffy whipped cream, and fresh strawberries, this cake brings together simple ingredients in a sweet little dessert that’s perfect for celebrating someone special.
The sponge is light and delicate, with a tender texture that comes from the combination of eggs, flour, and cornstarch. A little cooking oil keeps the crumb moist, while fresh milk adds richness without making the cake feel heavy. The result is a beautifully soft base that pairs wonderfully with the creamy filling.
What makes this recipe particularly interesting is the two-stage air fryer baking method. The cake starts covered with aluminum foil at a lower temperature, helping it cook gently, before the foil is removed for a second baking stage. This approach helps the sponge finish baking while allowing the top to develop a little color.
Between the layers, sweetened whipped cream and fresh strawberries provide a lovely contrast. The berries bring natural sweetness and a refreshing touch of acidity, while cocoa powder adds a gentle chocolate flavor to the decoration.
It’s a lovely choice for a small birthday gathering, an afternoon tea party, or simply a weekend baking project. The decoration can be as simple or as playful as you like, making it a fun cake to personalize.
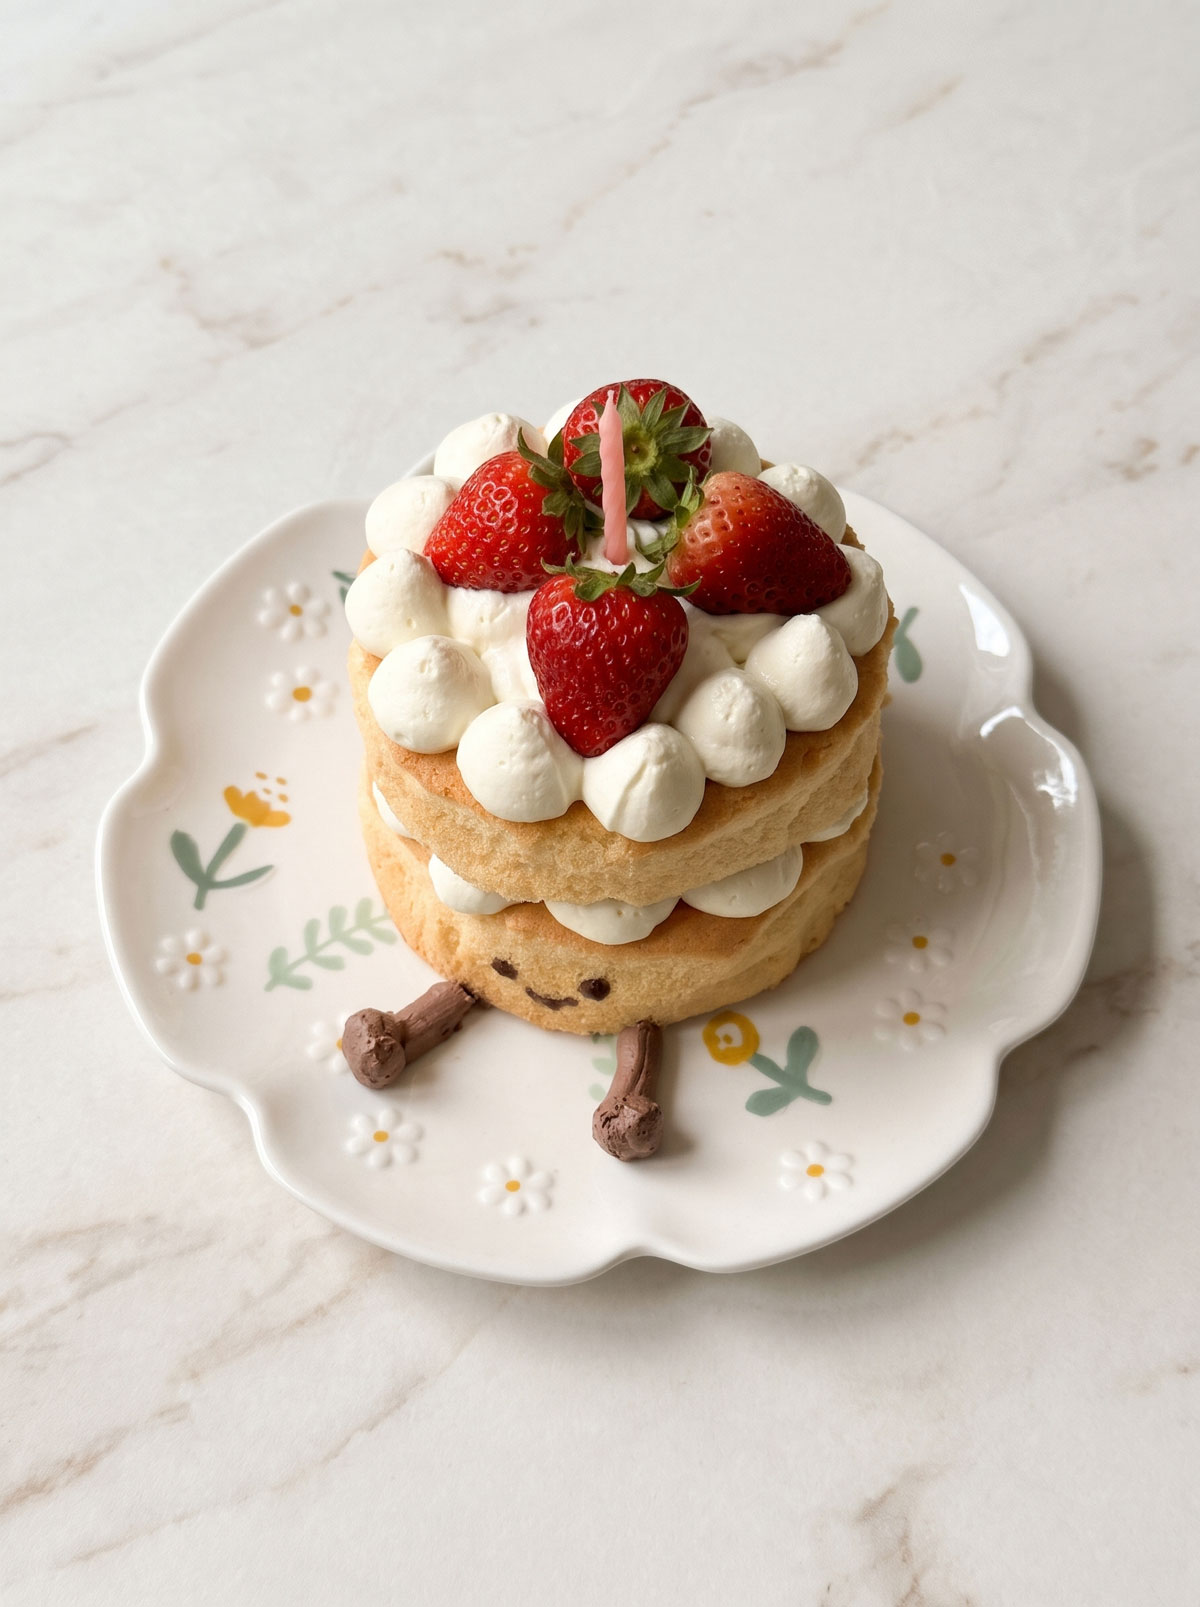
Love this adorable little cake? Save it to your Pinterest birthday cake board so you can make it for your next celebration!
Why You’ll Love This Recipe
- Adorably Homemade: The Jellycat-inspired appearance makes this cake especially charming for birthdays and small celebrations.
- Soft and Fluffy Sponge: Cornstarch and flour work together to create a delicate, tender crumb.
- Fresh Strawberry Filling: Whipped cream and strawberries create a light, fruity filling that balances the sweetness.
- Air Fryer Friendly: No conventional oven is necessary, making this a convenient option for smaller kitchens.
- Perfect for Small Gatherings: A 6-inch cake makes a lovely centerpiece without producing an oversized dessert.
Key Ingredients & Why
- Eggs: Eggs provide structure, moisture, and richness. Whipped egg whites can also incorporate air into the batter, helping create a light sponge texture.
- Cornstarch: Replacing part of the flour with cornstarch reduces the overall gluten content, contributing to a softer, more delicate crumb.
- Cooking Oil: Oil remains liquid at room temperature, helping the sponge retain moisture and stay tender after cooling.
- Unsweetened Fresh Milk: Milk adds moisture and helps bring the dry ingredients together while contributing a subtle creamy flavor.
- Whipping Cream: When whipped, the cream creates a light, airy filling that holds the strawberry layers together.
- Fresh Strawberries: Their natural sweetness and gentle acidity balance the richness of the cream and make each slice taste refreshing.
Variations & Substitutions
- Strawberry and Vanilla: Add ½ tsp vanilla extract to the whipping cream for a delicate vanilla aroma.
- Chocolate Cream Filling: Replace 1 tbsp of the optional cocoa powder decoration with 1 tbsp unsweetened cocoa powder mixed into the cream. Sift it in gradually to avoid lumps.
- Mixed Berry Cake: Replace the strawberries with an equal volume of fresh raspberries or blueberries. Pat the fruit dry before assembling.
- Dairy-Free Adaptation: Use 1:1 unsweetened plant-based milk for the fresh milk and a suitable dairy-free whipping alternative in place of the cream. The whipping alternative must be formulated for whipping.
- Citrus Sponge: Add ½ tsp finely grated lemon zest to the egg yolk mixture for a subtle citrus fragrance.
Equipment Needed
- 6-inch Round Cake Pan: Provides a suitable size for a small celebration cake. Use an air fryer-safe metal pan that fits comfortably inside your appliance.
- Air Fryer: Used for the two-stage baking process. Check your appliance manual for recommended pan clearance and foil use.
- Electric Hand Mixer: Helps whip the eggs and whipping cream to the appropriate consistency.
- Fine-Mesh Sieve: Essential for removing lumps from the flour, cornstarch, and cocoa powder.
- Mixing Bowls: Use separate clean bowls for the egg whites, egg yolks, and cream.
- Parchment Paper: Helps prevent the sponge from sticking to the bottom of the cake pan.
- Aluminum Foil: Covers the cake during the first baking stage. Secure it firmly so it cannot lift into the heating element or fan. Never use foil if your air fryer manufacturer prohibits it.
Yield & Exact Sizing
- Total Yield: One 6-inch round birthday cake, approximately 6 servings.
- Size & Shape: Approximately 6 inches (15 cm) in diameter. Once cooled, the sponge can be divided horizontally into two layers.
- Finished Height: Approximately 3-4 inches (7.5-10 cm), depending on sponge rise, filling thickness, and decoration.
- Cooking Shrinkage: A slight reduction in height after cooling is normal. Avoid pressing the sponge when assembling to preserve its airy texture.
Ingredients
For the Sponge Cake:
3 large eggs, separated
2 tbsp cooking oil
3 tbsp unsweetened fresh milk
2 tbsp plus 2 tsp cornstarch
6 tbsp plus 2 tsp all-purpose flour
¼ cup plus 1 tbsp granulated sugar, divided as needed
1 pinch salt
A few drops fresh lemon juice
For the Cream Filling:
1 cup heavy whipping cream, cold
1 tbsp plus 2 tsp granulated sugar
1-2 tbsp unsweetened cocoa powder, for decoration
1 cup fresh strawberries, washed, dried, and sliced
Note: The original recipe does not specify the cocoa powder or strawberry quantities. These are practical starting estimates for a 6-inch cake.
Instructions
1. Prepare the cake pan. Line the bottom of a 6-inch round cake pan with parchment paper. Separate the eggs carefully, placing the whites in a completely clean, dry mixing bowl and the yolks in another bowl.
2. Make the milk and oil mixture. Combine the cooking oil and fresh milk in a bowl, stirring until evenly blended. Add the egg yolks and mix until smooth.
3. Incorporate the dry ingredients. Sift the cornstarch and all-purpose flour into the yolk mixture. Stir gently until you have a smooth, lump-free batter. Avoid excessive mixing.
4. Whip the egg whites. Add the salt and a few drops of lemon juice to the egg whites. Begin beating until foamy, then gradually add the sugar while continuing to whip. Stop when medium-stiff peaks form.
5. Fold the mixtures together. Add one-third of the whipped egg whites to the yolk batter and gently fold to lighten it. Add the remaining egg whites in two additions, folding carefully until no large white streaks remain.
6. Transfer the batter. Pour the batter into the prepared cake pan. Gently tap the pan against the counter once or twice to release larger air pockets.
7. Bake the first stage. Preheat the air fryer if your model requires it. Cover the cake pan securely with aluminum foil and bake at 266°F (130°C) for 30 minutes. Make sure the foil cannot contact the heating element.
8. Bake the second stage. Carefully remove the foil and continue baking at 284°F (140°C) for 15 minutes. Check that the center is fully baked before removing the cake.
9. Cool the sponge. Remove the pan from the air fryer and allow the cake to cool. Once completely cool, carefully remove it from the pan and divide it horizontally into two even layers.
10. Prepare the whipped cream. Pour the cold whipping cream into a chilled mixing bowl. Add the sugar and beat until medium-stiff peaks form. Refrigerate until ready to assemble.
11. Prepare the strawberries. Wash and thoroughly dry the strawberries. Remove their stems and slice them evenly for the filling.
12. Assemble the cake. Place the bottom sponge layer on a serving plate. Spread an even layer of whipped cream over it, arrange the sliced strawberries on top, and add a little more cream to secure the filling.
13. Finish the cake. Place the second sponge layer on top. Cover the cake with the remaining whipped cream, smoothing the surface gently.
14. Decorate and chill. Dust with cocoa powder using a fine sieve and arrange additional strawberries as desired. Refrigerate for at least 1 hour before serving so the filling can settle.
Visual & Tactile Cues
Sponge Cake Preparation
- Egg Yolk Batter: The mixture should look smooth, creamy, and free from visible flour lumps. It should flow slowly from a spatula.
- Whipped Egg Whites: The whites should look glossy and hold a peak that stands with a slight bend at the tip. They should not look dry or grainy.
- Combined Batter: The finished batter should look pale, airy, and evenly mixed. It should fall from the spatula in thick ribbons.
Air Fryer Baking
- First Stage: The cake should gradually rise while remaining protected under the foil.
- Second Stage: The top should become lightly golden and look set rather than wet.
- Doneness: A toothpick inserted into the center should come out clean or with a few dry crumbs. The center should spring back gently when touched.
Cream Filling & Assembly
- Whipped Cream: It should look fluffy and hold its shape without becoming grainy or separating.
- Strawberries: The fruit should be dry, fresh, and firm enough to retain its shape when sliced.
- Finished Cake: The cream should hold the layers together, and the sponge should feel soft rather than compressed.
Cooking Notes (Pro Tips)
- Use Room-Temperature Eggs: Eggs at room temperature generally whip more easily and incorporate air more efficiently.
- Keep the Egg Whites Bowl Clean: Even a small amount of egg yolk or grease can interfere with whipping. Use a clean, dry bowl and beaters.
- Fold, Don’t Stir: Fold the egg whites into the batter gently. Aggressive mixing removes the air responsible for the sponge’s light texture.
- Check Your Air Fryer: Air fryer heating patterns vary considerably. The stated temperatures and times are the original recipe’s settings, but your appliance may require adjustments. Always prioritize a fully baked center.
Storage & Reheating Guide
- Refrigerator: Store the assembled cake in an airtight cake container in the refrigerator at 40°F (4°C) or below. For the best quality, enjoy within 2-3 days.
- Freezer: The assembled whipped cream and strawberry cake is not ideal for freezing because the cream and fruit may release moisture when thawed. The plain, unfilled sponge can be wrapped tightly and frozen for up to 2 months.
- Thawing: Thaw frozen sponge in the refrigerator while still wrapped to help prevent condensation from collecting directly on the cake.
- Serving: Allow refrigerated slices to sit at room temperature for approximately 10 minutes before serving for a softer sponge and cream texture.
- Reheating: This cake is best enjoyed chilled or slightly cool. Do not microwave assembled slices because the whipped cream can melt and the strawberries can become watery.
Serving Suggestions
This adorable little cake is ideal for birthday celebrations, afternoon tea, or a cozy homemade dessert table. Keep the accompaniments light so the strawberry and cream flavors remain the stars.
- Fresh Strawberry Platter: Extra strawberries add freshness and make the presentation feel more festive.
- Hot Green Tea: A lightly brewed green tea provides a gentle, slightly earthy contrast to the sweet cream.
- Homemade Iced Lemon Tea: Its refreshing citrus notes complement the strawberries and balance the richness of the whipped cream.
- Vanilla Ice Cream: A small scoop makes this dessert extra special for anyone who enjoys a richer birthday treat.
Nutrition Facts
Estimated Nutrition per Serving
Based on 6 servings, including estimated quantities of strawberries and cocoa powder.
- Calories: 330 kcal
- Fat: 23 g
- Carb: 25 g
- Protein: 5 g
Disclaimer: This nutritional information is an estimate provided by an online calculator and is meant for informational purposes only. Actual values will vary depending on ingredient brands, quantities, and portion sizes.
Recipe Science
Jellycat Birthday Cake is a small layered sponge cake made with eggs, cooking oil, milk, flour, and cornstarch. Its primary cooking method is two-stage air fryer baking, followed by assembly with sweetened whipped cream and fresh strawberries. The result is a soft sponge with a light filling and a fresh fruit component. The combination is particularly suitable for small celebration cakes because the individual components can be prepared with relatively simple kitchen equipment.
The sponge structure depends largely on the eggs. Whipping the egg whites incorporates air bubbles that expand during heating, helping the cake rise. Egg proteins coagulate as the temperature increases, establishing the cake’s structure. Cornstarch dilutes the gluten-forming proteins in the flour, encouraging a more tender crumb, while cooking oil contributes moisture retention. The initial foil covering reduces direct exposure of the cake surface to the air fryer’s circulating heat. Removing the foil for the second stage allows the surface to finish setting and develop color. Whipping cream incorporates air through fat-stabilized bubbles, producing a soft filling that complements the sponge.
This preparation method is practical for households with a small air fryer or limited conventional oven access. However, air fryer models differ in heating intensity, airflow, and internal space, so the specified 45-minute baking schedule should be treated as a starting point rather than a universal guarantee. The cake should be checked for doneness before assembly. Because whipped cream and fresh strawberries are perishable, the finished cake should remain refrigerated at 40°F (4°C) or below. Keeping the plain sponge separate until assembly also offers more flexibility when preparing the dessert ahead of time.
From a nutritional perspective, the cake contributes energy primarily through cooking oil, whipping cream, sugar, and flour. The FDA Daily Values for added sugar, saturated fat, and sodium are 50 g, 20 g, and 2,300 mg, respectively. The estimated sugar and saturated fat content of one serving is below 20% of their respective Daily Values, although exact amounts depend on the whipping cream and ingredient brands used. Using less added sugar in the cream can reduce sweetness without substantially changing the sponge structure. The nutritional estimate is approximate because the original recipe does not specify exact quantities for the fruit and cocoa powder.
Frequently Asked Questions
– Can I make this cake without an oven? Yes! The original method uses an air fryer, making it a convenient option for kitchens without a conventional oven.
– Why did my sponge cake collapse after baking? Possible reasons include underbaking, overmixing after adding the whipped egg whites, or opening the air fryer too frequently during baking.
– Can I prepare the sponge a day ahead? Yes. Allow it to cool completely, wrap it tightly, and refrigerate it. Assemble with the whipped cream and strawberries closer to serving time.
– Can I use frozen strawberries? Fresh strawberries are preferable because frozen berries release additional moisture as they thaw. If frozen fruit is your only option, thaw and drain it thoroughly before using.
– What if I cannot find heavy whipping cream outside the United States? Look for dairy cream labeled whipping cream or cream with approximately 30-36% milk fat. Check that the product is suitable for whipping rather than using ordinary cooking cream.
– Can I make this cake less sweet? Yes. You can slightly reduce the sugar in the whipped cream. Avoid making major reductions to the sponge sugar because it also contributes to the cake’s structure and texture.
– How long should I chill the cake before serving? At least 1 hour is recommended. This helps the cream filling settle and makes slicing easier.
Conclusion
A little homemade cake can make a birthday feel extra special, and this Jellycat-inspired strawberry cream sponge is a lovely example. From the fluffy sponge to the fresh strawberries and soft whipped cream, every layer brings something delightful to the table.
Don’t worry if your decoration isn’t perfect. The best homemade cakes are the ones made with care and shared with people you love. I’d love to know: Would you decorate yours with extra strawberries or add a little chocolate detail?
Happy cooking, friend!
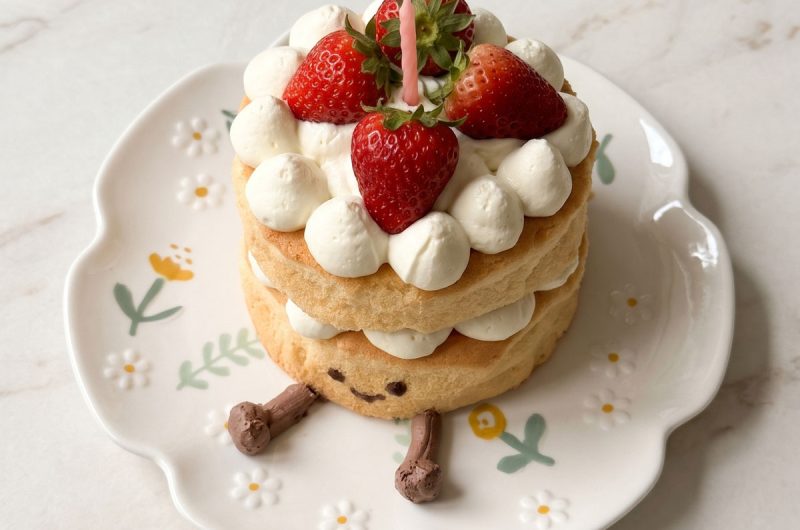
Jellycat birthday cake
Course: DessertsCuisine: JapaneseDifficulty: Medium6
servings30
minutes40
minutes330
kcalA soft, fluffy sponge cake layered with lightly sweetened whipped cream and fresh strawberries, decorated with cocoa powder for an adorable Jellycat-inspired birthday cake. Baked in two stages in an air fryer, this little celebration cake is a charming homemade treat.
Ingredients
- For the Sponge Cake:
3 large eggs, separated
2 tbsp cooking oil
3 tbsp unsweetened fresh milk
2 tbsp plus 2 tsp cornstarch
6 tbsp plus 2 tsp all-purpose flour
¼ cup plus 1 tbsp granulated sugar, divided as needed
1 pinch salt
A few drops fresh lemon juice
- For the Cream Filling:
1 cup heavy whipping cream, cold
1 tbsp plus 2 tsp granulated sugar
1-2 tbsp unsweetened cocoa powder, for decoration
1 cup fresh strawberries, washed, dried, and sliced
Directions
- Prepare the cake pan. Line the bottom of a 6-inch round cake pan with parchment paper. Separate the eggs carefully, placing the whites in a completely clean, dry mixing bowl and the yolks in another bowl.
- Make the milk and oil mixture. Combine the cooking oil and fresh milk in a bowl, stirring until evenly blended. Add the egg yolks and mix until smooth.
- Incorporate the dry ingredients. Sift the cornstarch and all-purpose flour into the yolk mixture. Stir gently until you have a smooth, lump-free batter. Avoid excessive mixing.
- Whip the egg whites. Add the salt and a few drops of lemon juice to the egg whites. Begin beating until foamy, then gradually add the sugar while continuing to whip. Stop when medium-stiff peaks form.
- Fold the mixtures together. Add one-third of the whipped egg whites to the yolk batter and gently fold to lighten it. Add the remaining egg whites in two additions, folding carefully until no large white streaks remain.
- Transfer the batter. Pour the batter into the prepared cake pan. Gently tap the pan against the counter once or twice to release larger air pockets.
- Bake the first stage. Preheat the air fryer if your model requires it. Cover the cake pan securely with aluminum foil and bake at 266°F (130°C) for 30 minutes. Make sure the foil cannot contact the heating element.
- Bake the second stage. Carefully remove the foil and continue baking at 284°F (140°C) for 15 minutes. Check that the center is fully baked before removing the cake.
- Cool the sponge. Remove the pan from the air fryer and allow the cake to cool. Once completely cool, carefully remove it from the pan and divide it horizontally into two even layers.
- 10. Prepare the whipped cream. Pour the cold whipping cream into a chilled mixing bowl. Add the sugar and beat until medium-stiff peaks form. Refrigerate until ready to assemble.
- 11. Prepare the strawberries. Wash and thoroughly dry the strawberries. Remove their stems and slice them evenly for the filling.
- 12. Assemble the cake. Place the bottom sponge layer on a serving plate. Spread an even layer of whipped cream over it, arrange the sliced strawberries on top, and add a little more cream to secure the filling.
- 13. Finish the cake. Place the second sponge layer on top. Cover the cake with the remaining whipped cream, smoothing the surface gently.
- 14. Decorate and chill. Dust with cocoa powder using a fine sieve and arrange additional strawberries as desired. Refrigerate for at least 1 hour before serving so the filling can settle.